By: Frank White /FSS Editor
Aviation has a unique way of capturing a young person's imagination. It teaches discipline, physics, geography, and critical thinking all at once.
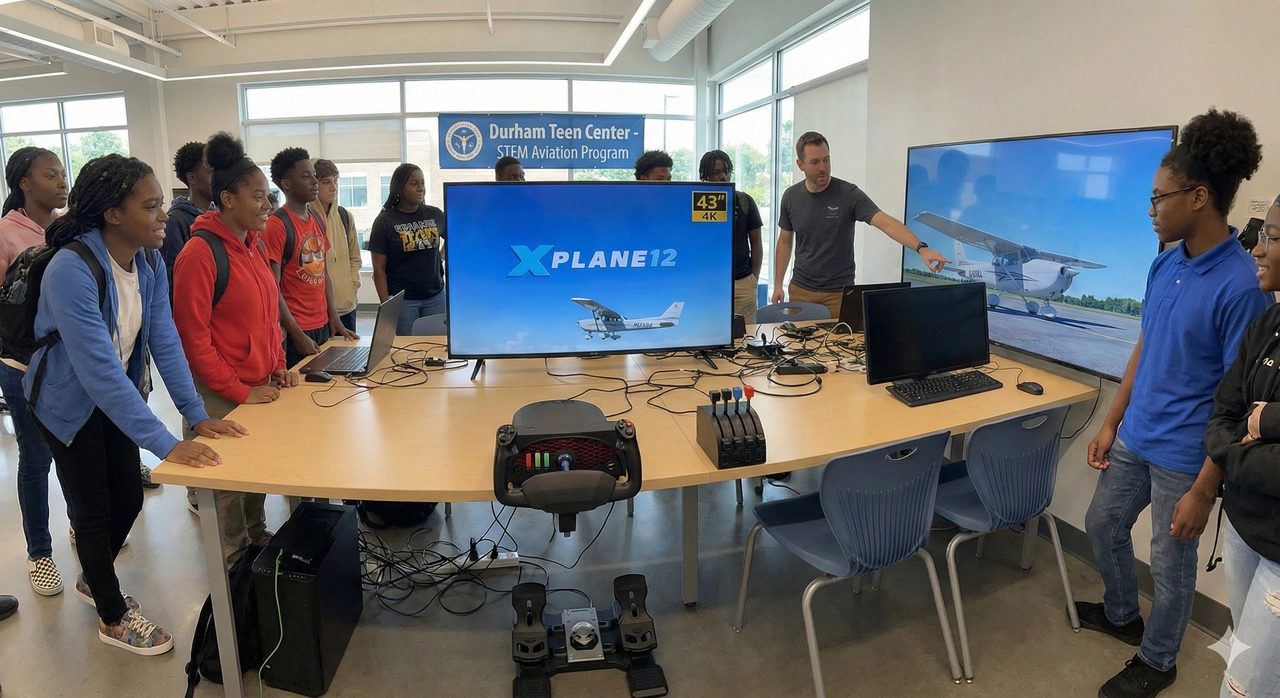
Recently, I’ve had the privilege of volunteering at the Durham Teen Center, helping introduce students to the world of flight. To support this, we are building a dedicated flight simulation station.
Whether you are a community center, a school STEM program, or a parent looking to build a serious training rig for a teenager, you don't need a multi-million dollar budget. You just need the right gear.
Here are two distinct paths to getting airborne: the rock-solid "Cadet" build and the high-fidelity "Captain" build.
1. The Software: Why We Recommend X-Plane 12
Before buying hardware, you need to choose the simulation platform. For educational and training environments, we strongly recommend X-Plane 12.
-
Reliability: X-Plane 12 installs the world data locally on the computer. It only requires a brief internet check every few months to validate the license.
-
No Data Caps: The alternative (Microsoft Flight Simulator 2024) streams terabytes of data from the cloud as you fly, therefore a solid, constant and fast internet is required. Be aware that in a public facility, this can clog the network, cause lag if internet is slow, and rapidly hit ISP data caps.
-
Training Focus: X-Plane’s physics engine is widely regarded as the industry standard for flight training, prioritizing realistic aerodynamics over "gamey" visuals.
2. The "Cadet" Build (Budget & Durability)
Target: Public spaces, high traffic, and learning the basics.
For a shared environment like a Teen Center, durability is king. This setup is designed to survive hundreds of enthusiastic landings while still teaching the fundamentals of flight.
The Computer (The Engine)
We aren't looking for a spaceship, but we need enough horsepower to run X-Plane smoothly.
The Controls (The Hands-On)
3. The "Captain" Build (Mid-Range & Realism)
Target: Serious students, instrument training, and immersion.
This setup mimics the ergonomics of a real cockpit. It introduces "muscle memory" that transfers directly to real-world flying lessons.
The Computer (The Powerhouse)
To run higher detail scenery and complex aircraft models, we need a bit more headroom.
The Controls (The "Feel")
-
Yoke & Throttle: Honeycomb Aeronautical (Alpha & Bravo).
-
Rudder Pedals:
-
Option A (Available): Logitech G Pro Flight or Thrustmaster TFRP. These are widely available and reliable.
-
Option B (Quality): WinCtlr (formerly WinWing). If you can find them in stock, their metal construction offers incredible precision and durability for the price.
4. The Visuals: Go Big
Don't buy a standard 24-inch office monitor. Flight simulation relies heavily on peripheral vision.
-
The Recommendation: A 43-inch 4K display running at 144hz or better.
-
Why: A large TV placed directly behind the yoke fills the student's field of view, making the sensation of speed and altitude much more real. In a classroom setting, it also allows other students to watch and learn from the "pilot's" maneuvers (and mistakes!) without crowding the desk.
The Goal
The hardware is just the tool. The goal is to spark curiosity. Whether it's a "Cadet" rig or a "Captain" rig, the moment a student successfully greases their first landing, the equipment disappears, and they are simply flying.